# 一、XWiki基础
# 1.1 XWiki简介
XWiki源码Github地址 (opens new window)
XWIKI——WIKI私服,文档协同与团队知识库管理工具。
XWiki 是一个用 Java 编写的免费 wiki 软件平台,其设计重点是可扩展性。XWiki 是一个企业维基。它包括所见即所得(WYSIWYG)编辑、基于 OpenDocument 的文档导入/导出、语义注释和标记以及高级权限管理。
作为一个应用程序 wiki,XWiki 允许在 wiki 接口中存储结构化数据和执行服务器端脚本。包括 Velocity、 Groovy、 Python、 Ruby 和 PHP 在内的脚本语言可以使用 wiki 宏直接写入 wiki 页面。用户创建的数据结构可以在 wiki 文档中定义,这些结构的实例可以附加到 wiki 文档中,存储在数据库中,并使用 Hibernate 查询语言或 XWiki 自己的查询语言进行查询。
# 1.2 特点
- XWiki是使用Java编写,基于LGPL协议发布的开源Wiki引擎。
- XWiki为使用wiki范式开发项目和协作应用程序提供了一个通用平台。
- XWiki利用关系型数据库(HSQL, MySQL等)来存储数据。
# 二、安装
# 2.1 Docker安装
占用内存2.5G左右
目前(2022-06)最新版本为14,安装参考docker-xwiki (opens new window)项目的README,Using docker-compose一节使用docker-compose安装。
需要三个文件如下
xwiki.cnfxwiki的配置文件init.sql数据库初始化文件docker-compose.yml
# xwiki.cnf
XWiki的配置文件:xwiki.cnf
xwiki.cnf的官方配置地址 (opens new window)
# ---------------------------------------------------------------------------
# See the NOTICE file distributed with this work for additional
# information regarding copyright ownership.
#
# This is free software; you can redistribute it and/or modify it
# under the terms of the GNU Lesser General Public License as
# published by the Free Software Foundation; either version 2.1 of
# the License, or (at your option) any later version.
#
# This software is distributed in the hope that it will be useful,
# but WITHOUT ANY WARRANTY; without even the implied warranty of
# MERCHANTABILITY or FITNESS FOR A PARTICULAR PURPOSE. See the GNU
# Lesser General Public License for more details.
#
# You should have received a copy of the GNU Lesser General Public
# License along with this software; if not, write to the Free
# Software Foundation, Inc., 51 Franklin St, Fifth Floor, Boston, MA
# 02110-1301 USA, or see the FSF site: http://www.fsf.org.
# ---------------------------------------------------------------------------

[client]
default-character-set = utf8

[mysqld]
character-set-server = utf8
collation-server = utf8_bin
explicit_defaults_for_timestamp = 1

[mysql]
default-character-set = utf8
2
3
4
5
6
7
8
9
10
11
12
13
14
15
16
17
18
19
20
21
22
23
24
25
26
27
28
29
30
31
# init.sql
数据库初始化文件:init.sql
grant all privileges on *.* to xwiki@'%'
# docker-compose.yml
version: '2'
networks:
  bridge:
    driver: bridge
services:
  web:
    # Use an already built XWiki image from DockerHub.
    # 使用更新的镜像
    image: "xwiki:stable-mysql-tomcat"
    container_name: xwiki-mysql-tomcat-web
    depends_on:
      - db
    ports:
      - "8080:8080"
    # The DB_USER/DB_PASSWORD/DB_HOST variables are used in the hibernate.cfg.xml file.
    environment:
      - DB_USER=xwiki
      - DB_PASSWORD=xwiki
      - DB_DATABASE=xwiki
      - DB_HOST=xwiki-mysql-db
    # Provide a name instead of an auto-generated id for the xwiki permanent directory configured in the Dockerfile,
    # to make it simpler to identify in 'docker volume ls'.
    volumes:
      - ./data/xwiki-data:/usr/local/xwiki
    networks:
      - bridge
  # The container that runs MySQL
  db:
    image: "mysql:5.7"
    container_name: xwiki-mysql-db
    # - We provide a xwiki.cnf file in order to configure the mysql db to support UTF8 and be case-insensitive
    # We have to do it here since we use an existing image and that's how this image allows customizations.
    # See https://hub.docker.com/_/mysql/ for more details.
    # - Provide a name instead of an auto-generated id for the mysql data, to make it simpler to identify in
    # 'docker volume ls'
    volumes:
      - ./xwiki.cnf:/etc/mysql/conf.d/xwiki.cnf
      - ./init.sql:/docker-entrypoint-initdb.d/init.sql
      - ./data/mysql-data:/var/lib/mysql
    # Configure the MySQL database and create a user with provided name/password.
    # See https://hub.docker.com/_/mysql/ for more details.
    environment:
      - MYSQL_ROOT_PASSWORD=xwiki
      - MYSQL_USER=xwiki
      - MYSQL_PASSWORD=xwiki
      - MYSQL_DATABASE=xwiki
    networks:
      - bridge
volumes:
  mysql-data: {}
  xwiki-data: {}
2
3
4
5
6
7
8
9
10
11
12
13
14
15
16
17
18
19
20
21
22
23
24
25
26
27
28
29
30
31
32
33
34
35
36
37
38
39
40
41
42
43
44
45
46
47
48
49
50
51
52
等待老长一段时间后,启动成功。访问http://IP:8080
# 三、XWiki使用
# 3.1 初始化配置
第一步:注册管理员账户Admin User
这是xwiki的注册界面(XWiki 14.6),我们可以在此注册。
admin/123456

第二步:安装风格Flavor
选择XWiki Standard Flavor,点击install进行安装,等待好一会。。。
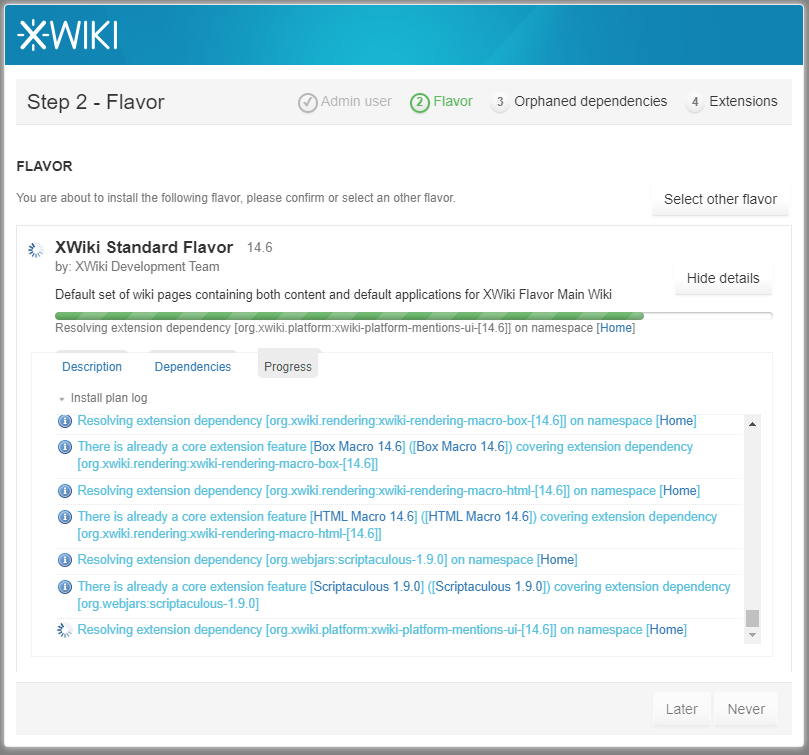
经过一段时间后,出现这个界面,就说明你的xwiki插件安装完毕了。
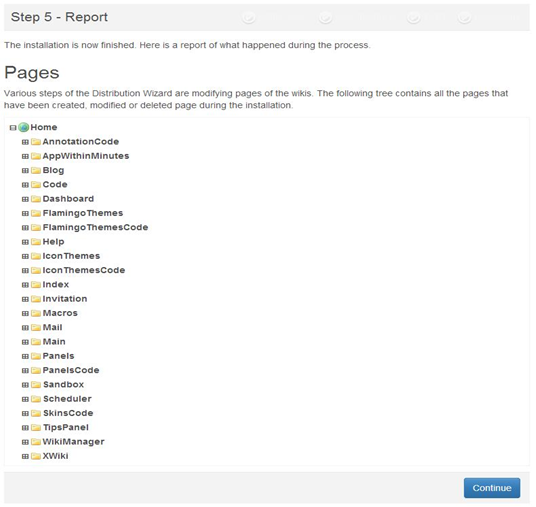
继续点击continue,进入首页。
第三步:设置中文
右上角侧边栏打开,点击Administer Wiki,点击Content,点击Localization。
调整SUPPORTED LANGUAGES与DEFAULT LANGUAGE的属性值。
取消English勾选,选择中文(Chinese)。
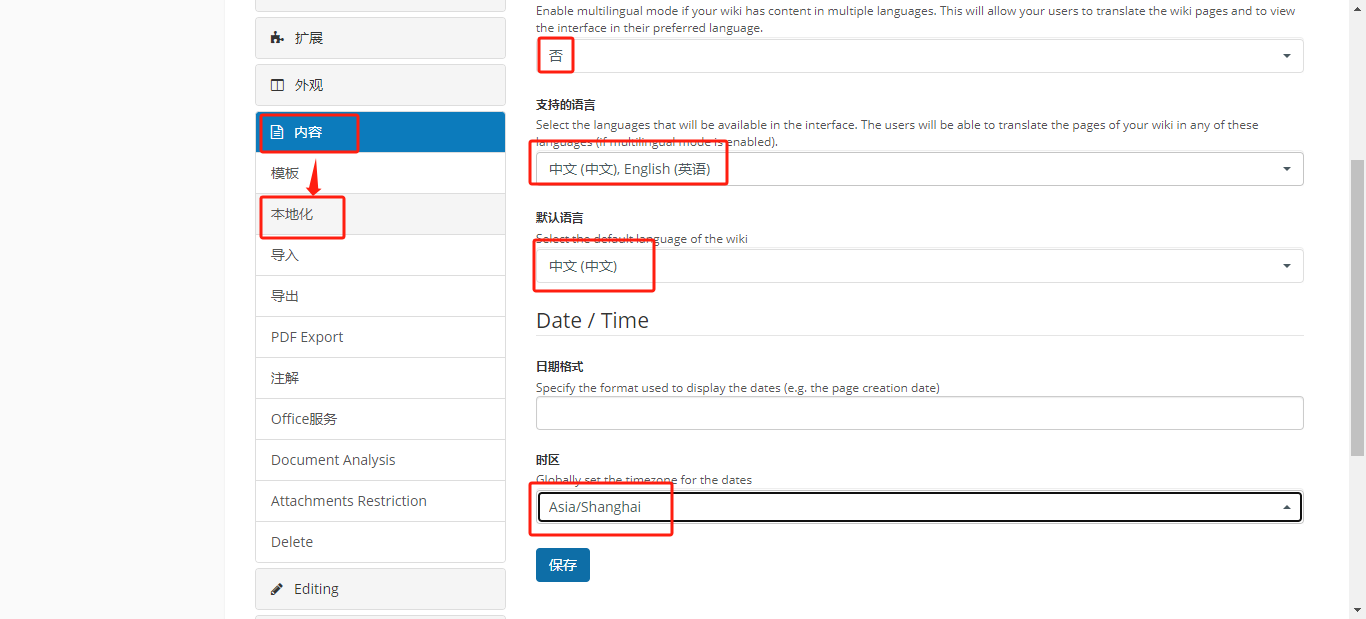
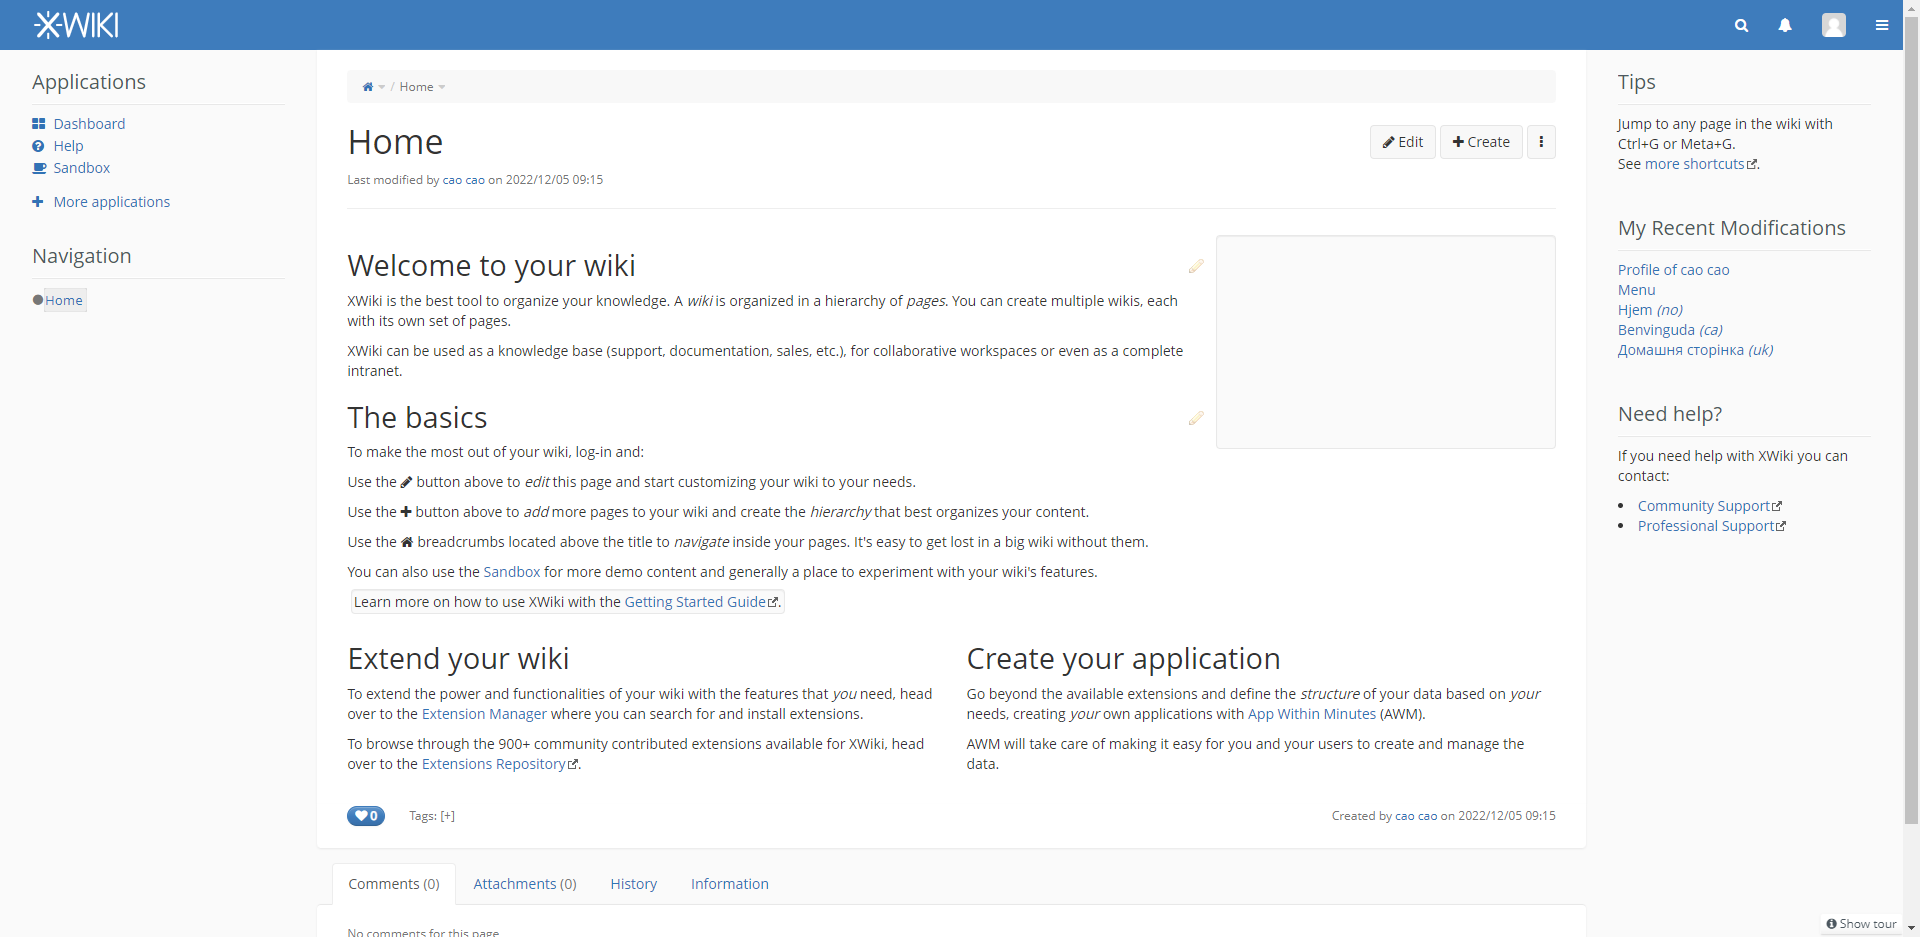
点击save,你就可以看到中文界面了。
至此,XWiki的安装工作就算完成了。
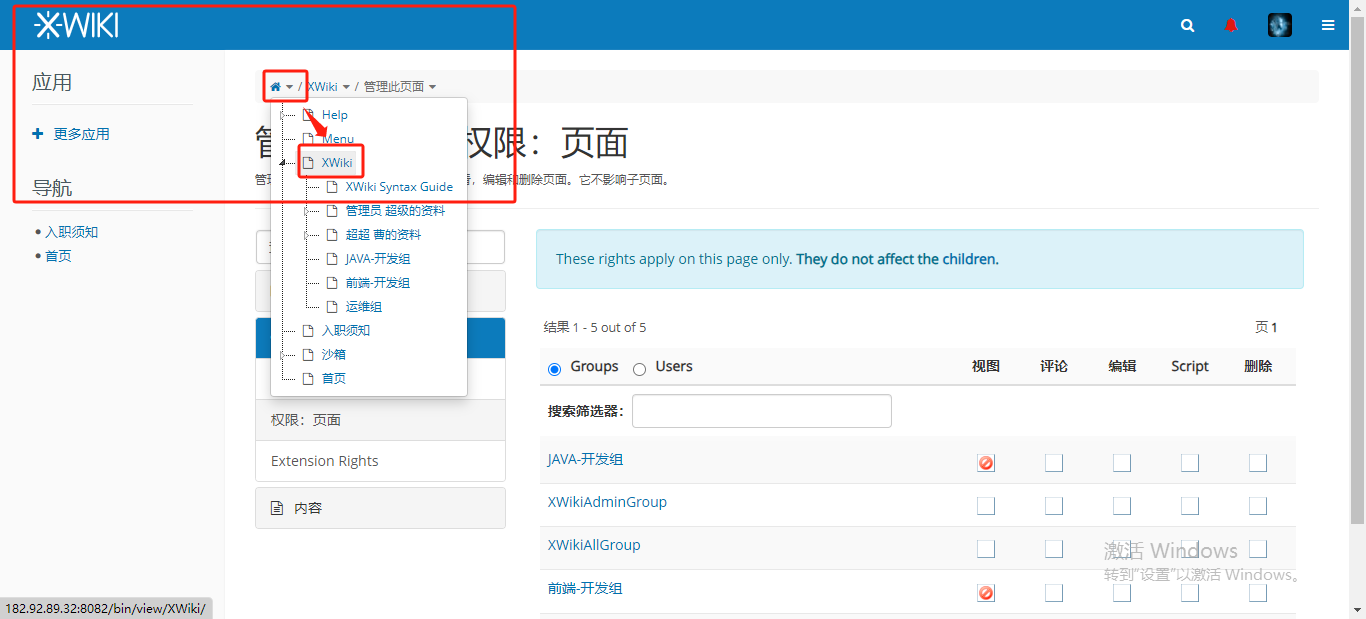
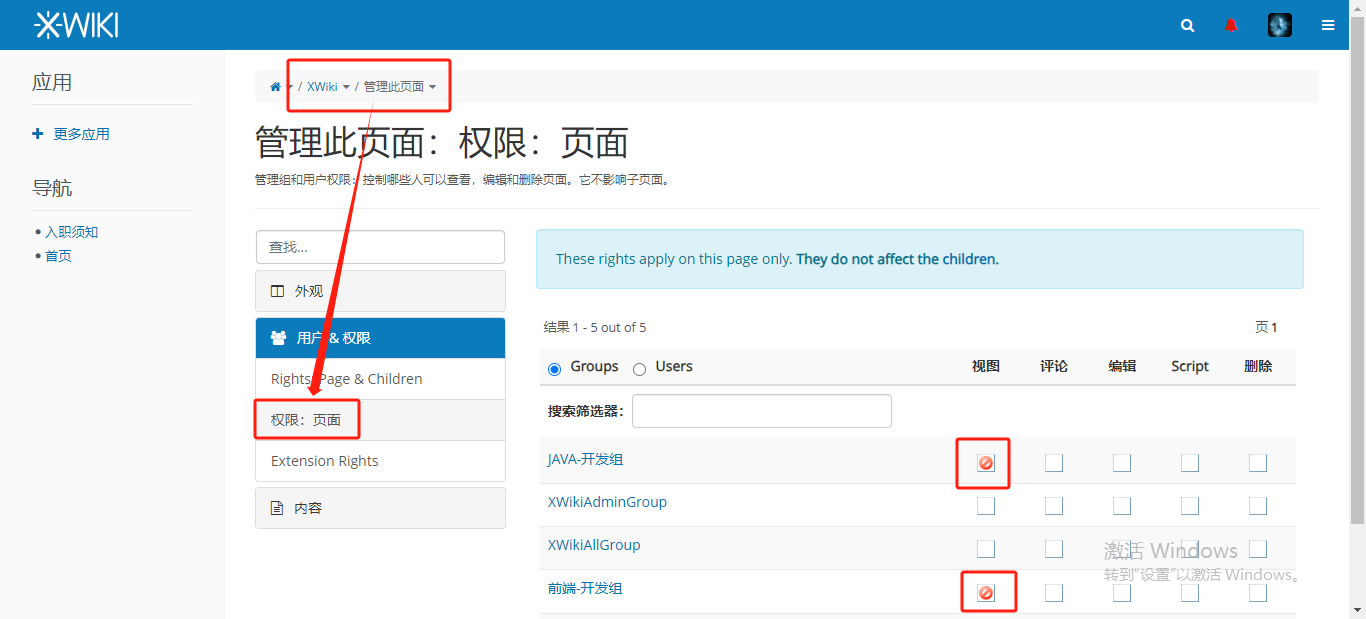
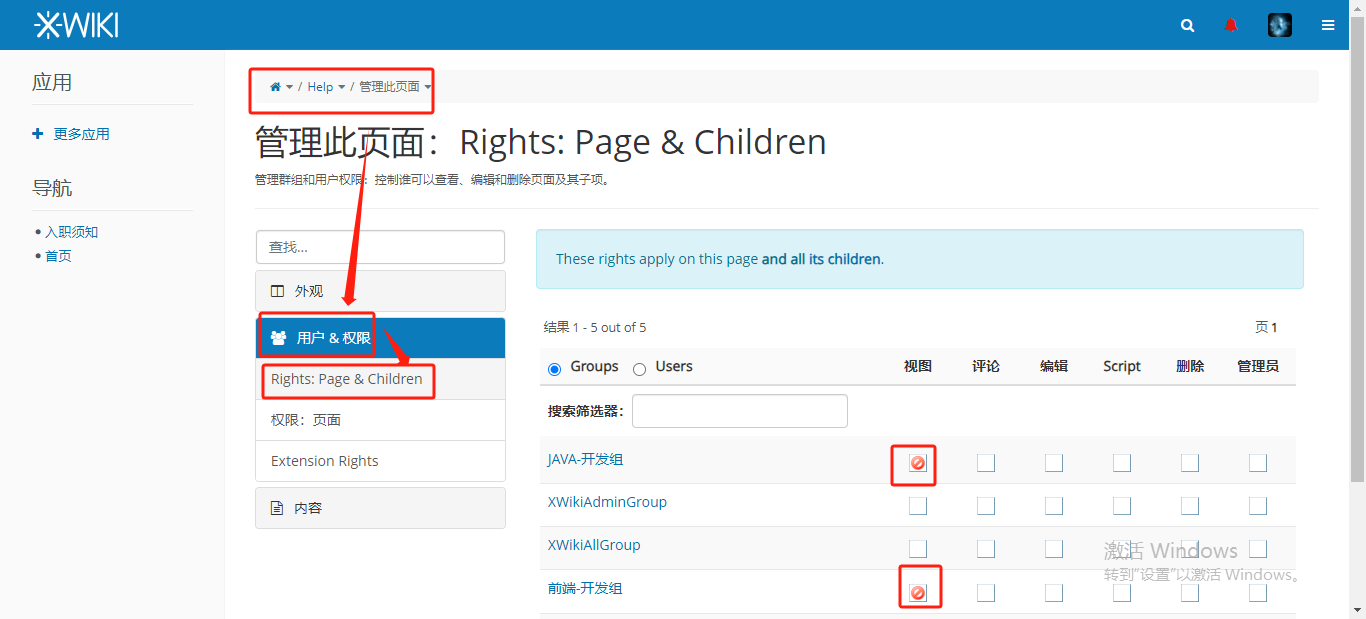
# 3.2 创建组&用户
# 创建组
右上角侧边栏打开,点击管理 Wiki,点击用户&权限,点击组。
点击创建组进行添加。
# 创建用户
右上角侧边栏打开,点击管理 Wiki,点击用户&权限,点击用户。
点击创建用户进行添加。
键入用户名、密码即可。
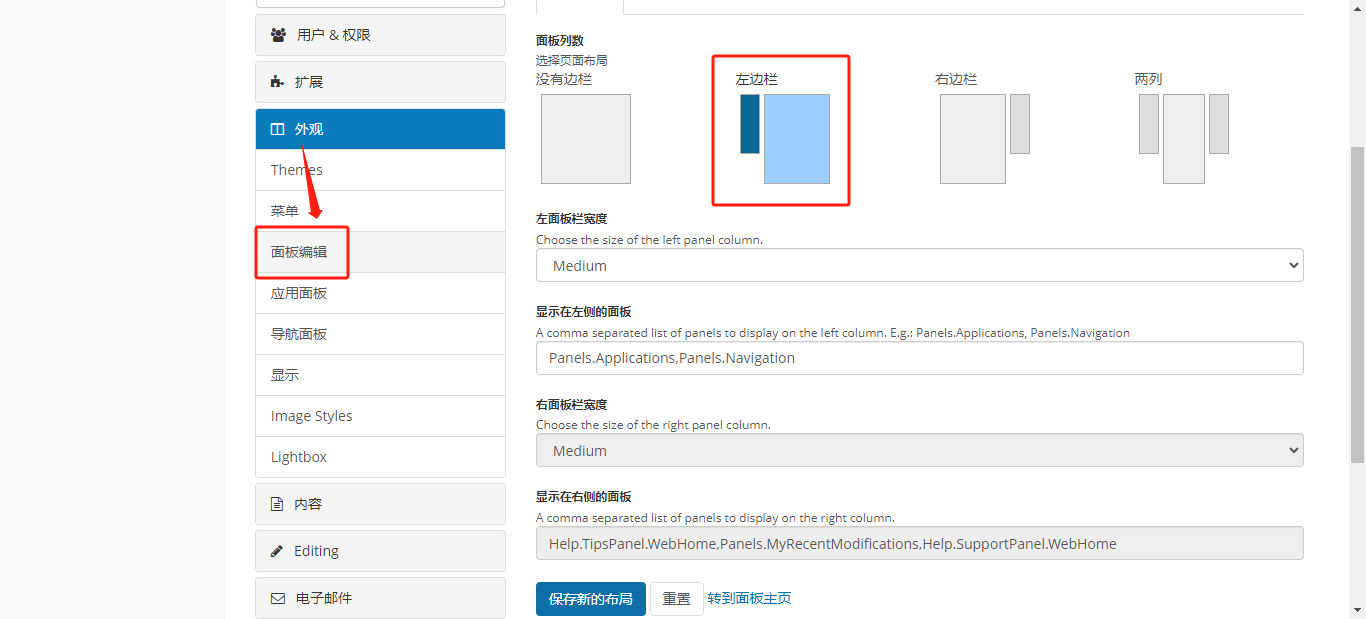
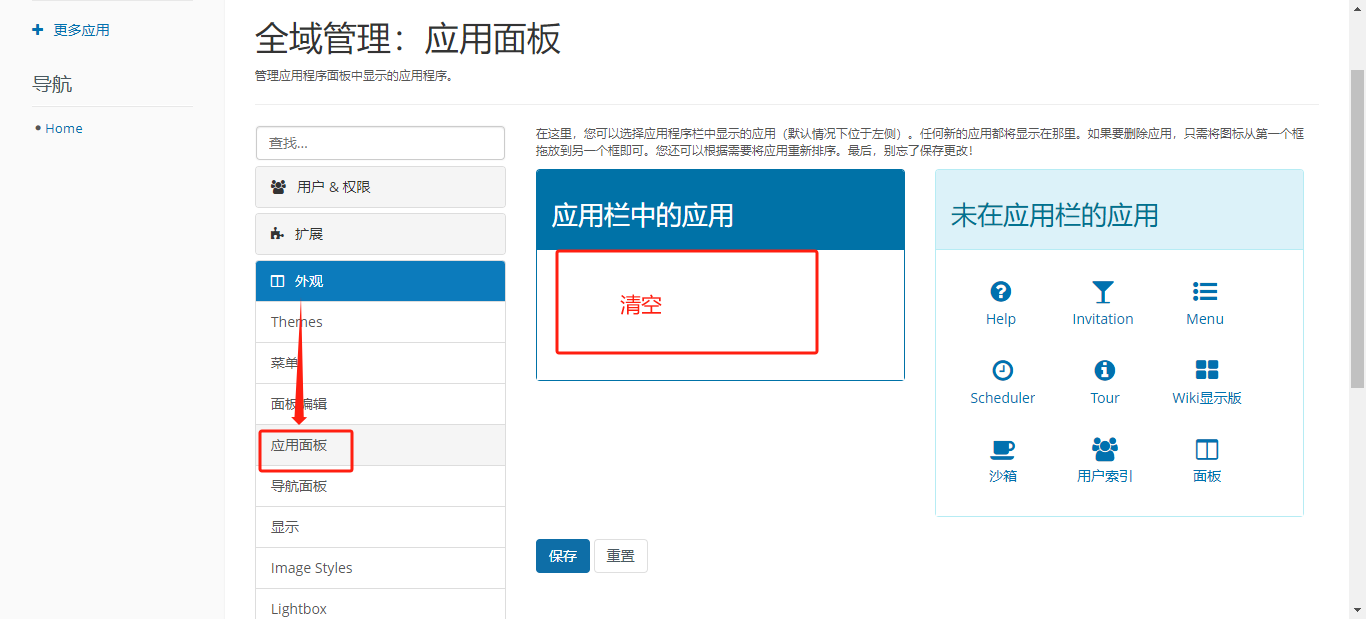
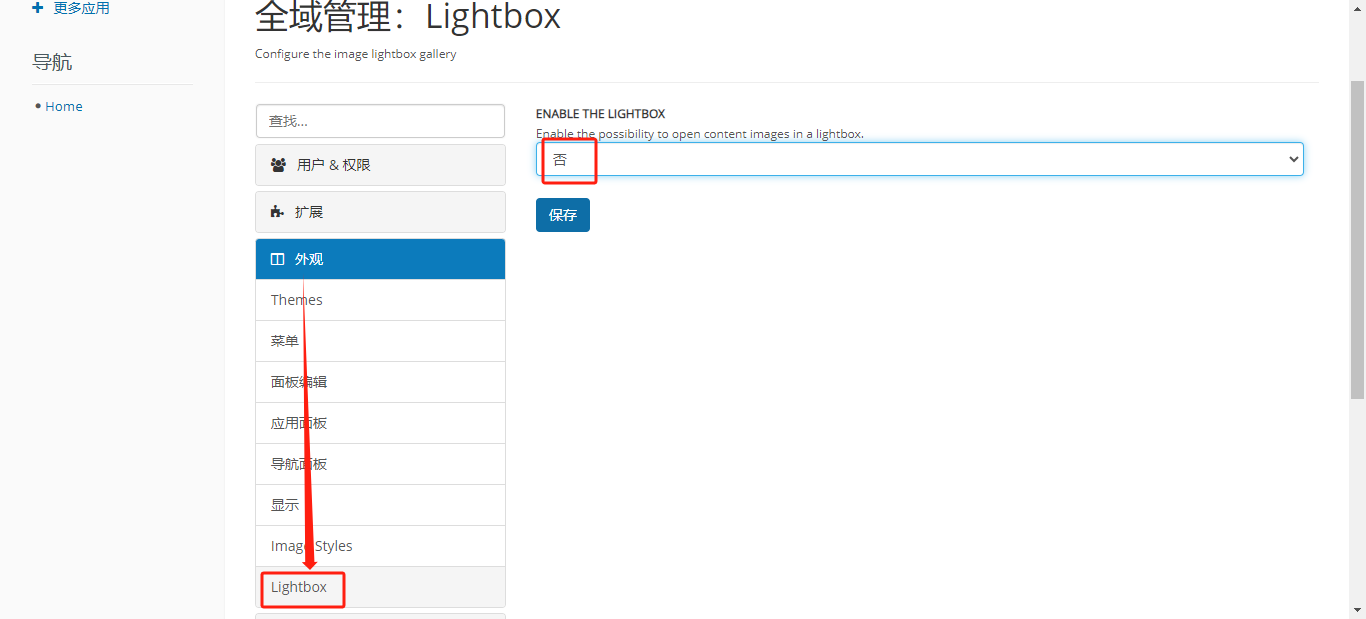
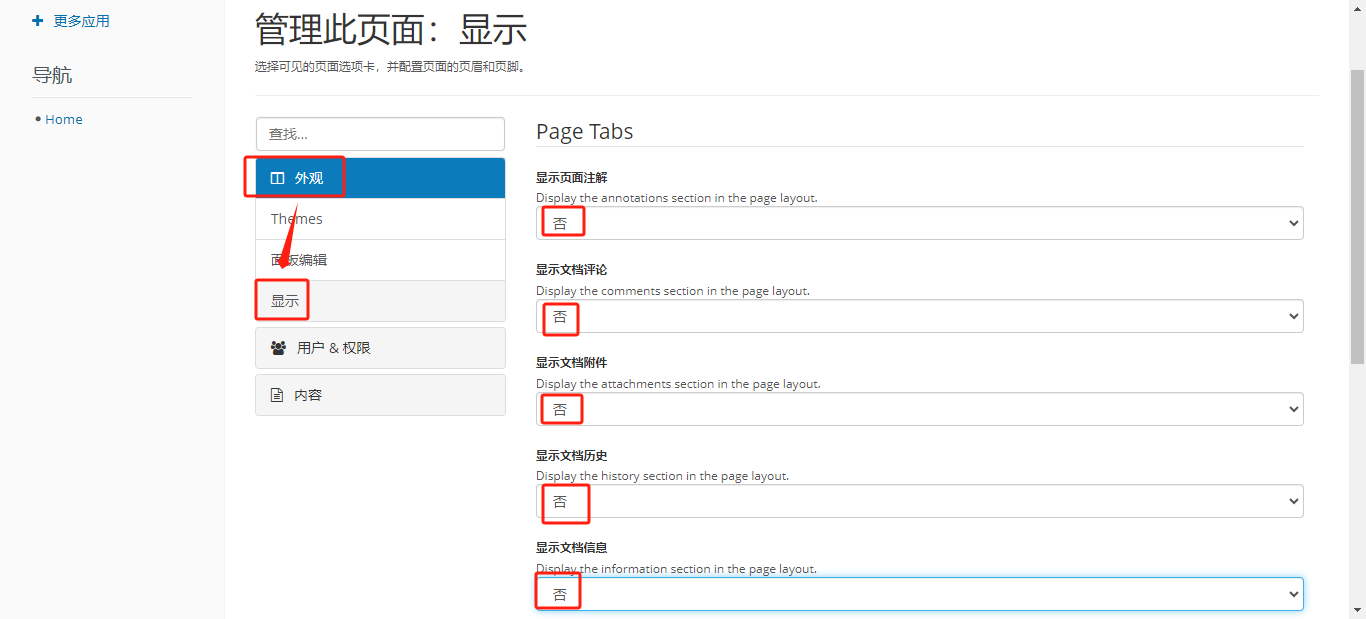
# 3.3 界面展示优化
# 外观
面板编辑
应用面板
显示

Lighbox
# 3.4 隐藏无用页面
隐藏xwiki页面
隐藏Help页面
隐藏沙箱页面

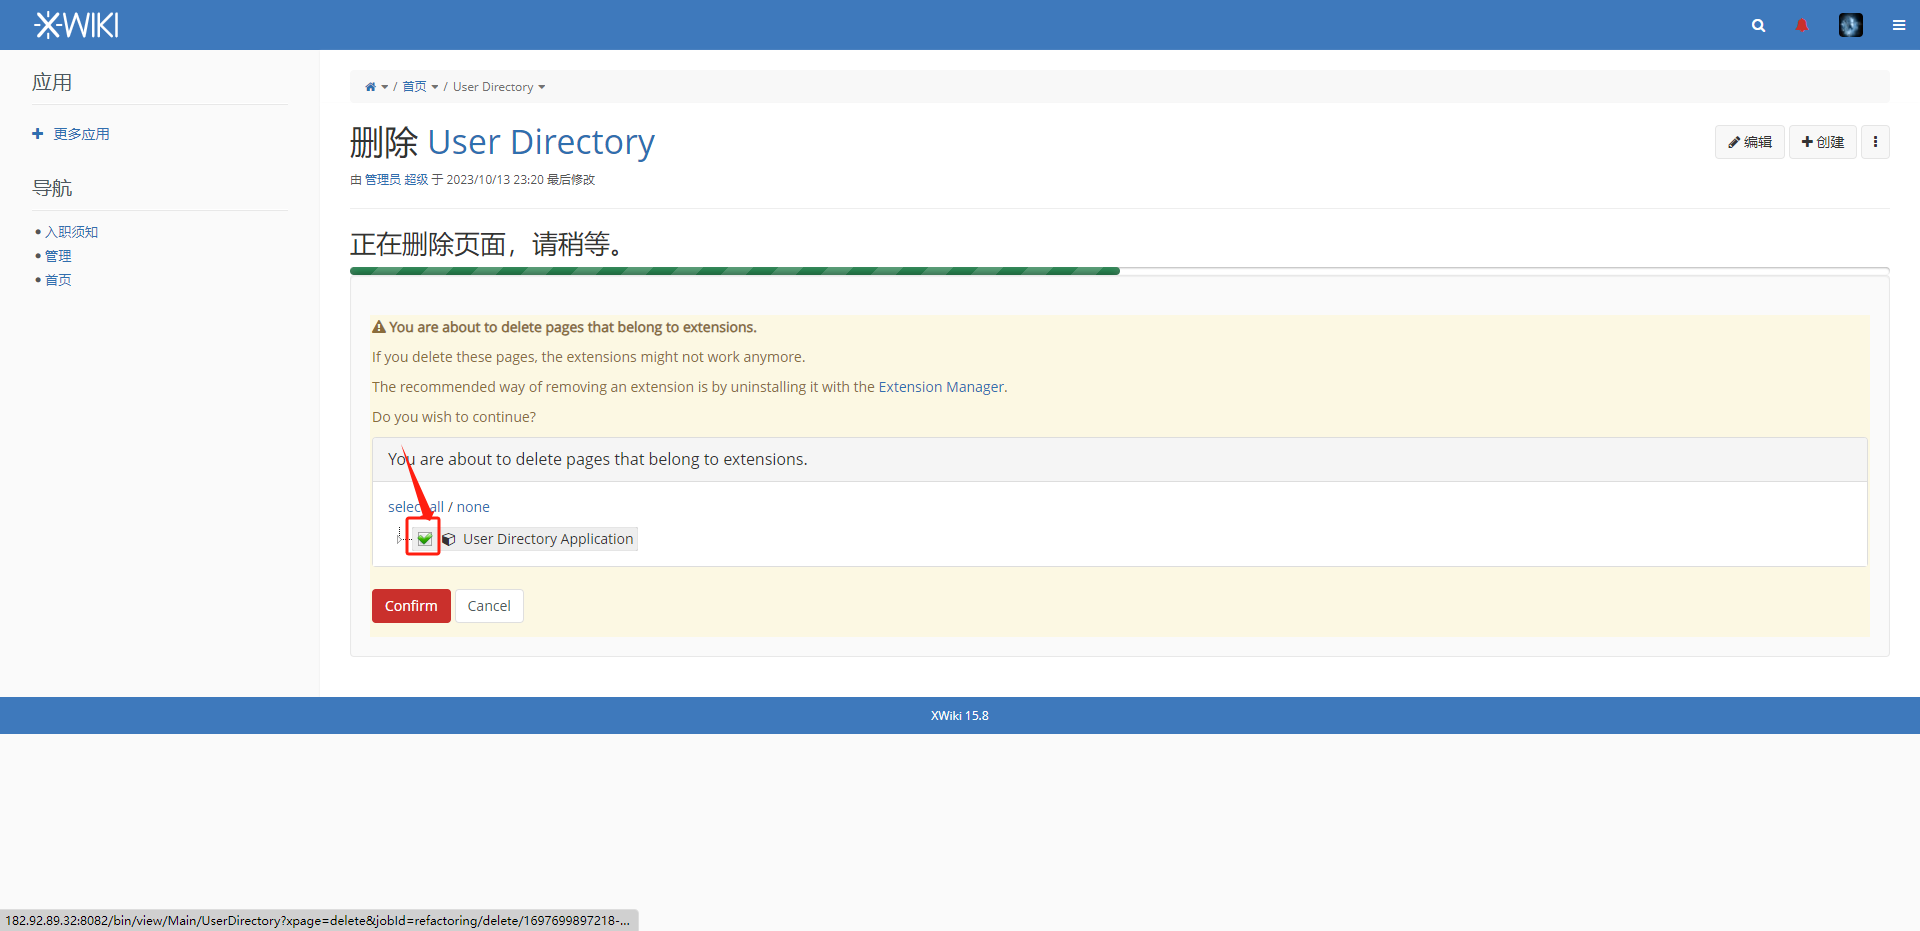
删除索引菜单
管理员登录系统,可以依次删除页面索引、用户索引、应用索引、WIKI索引菜单。

注意:删除的时候,勾选卸载扩展。
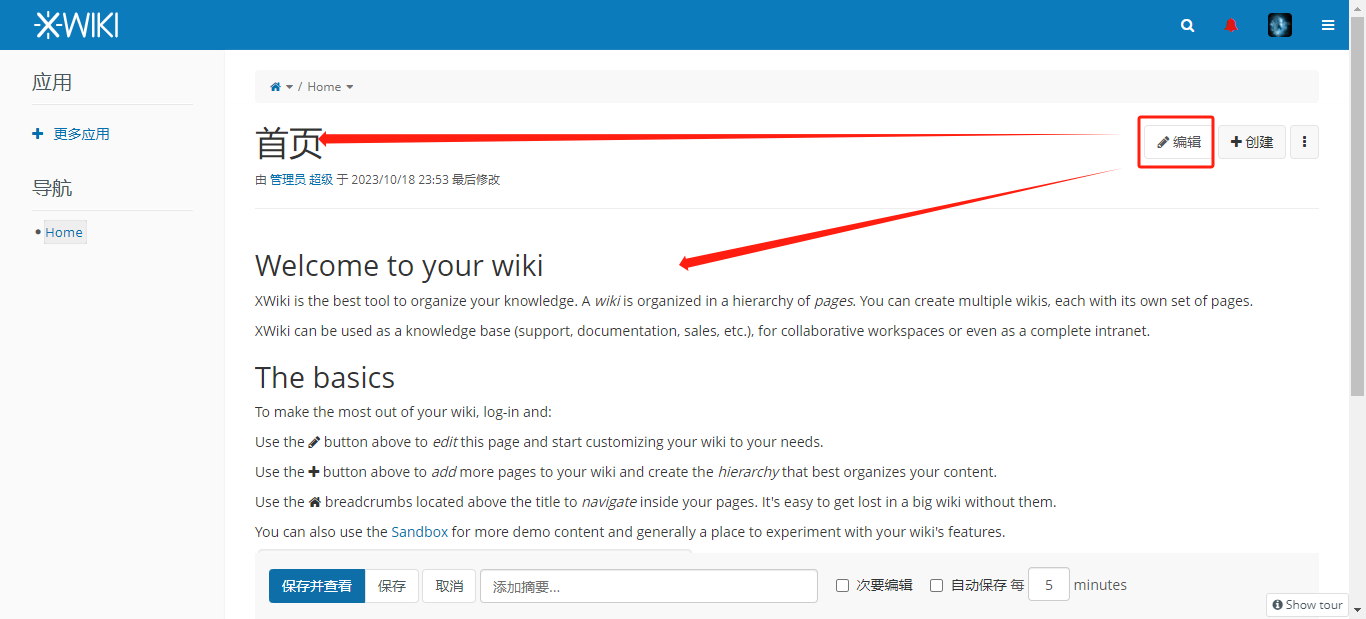
# 3.5 编辑Home页
编辑外观-显示
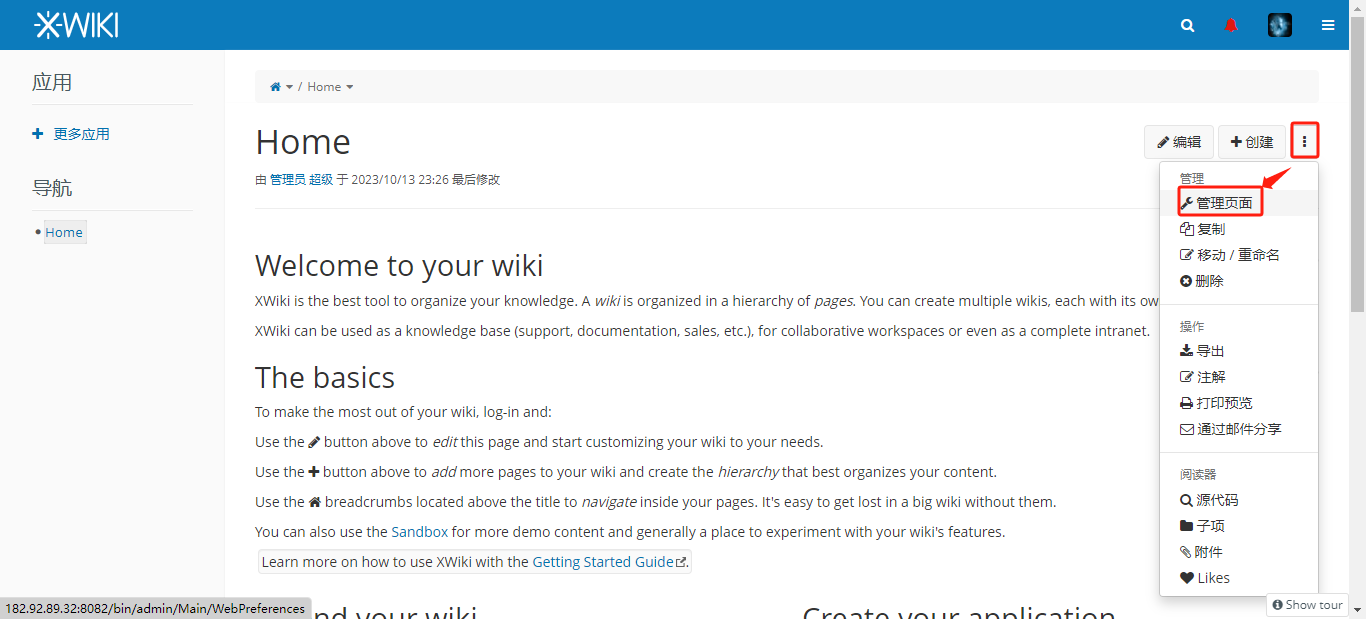
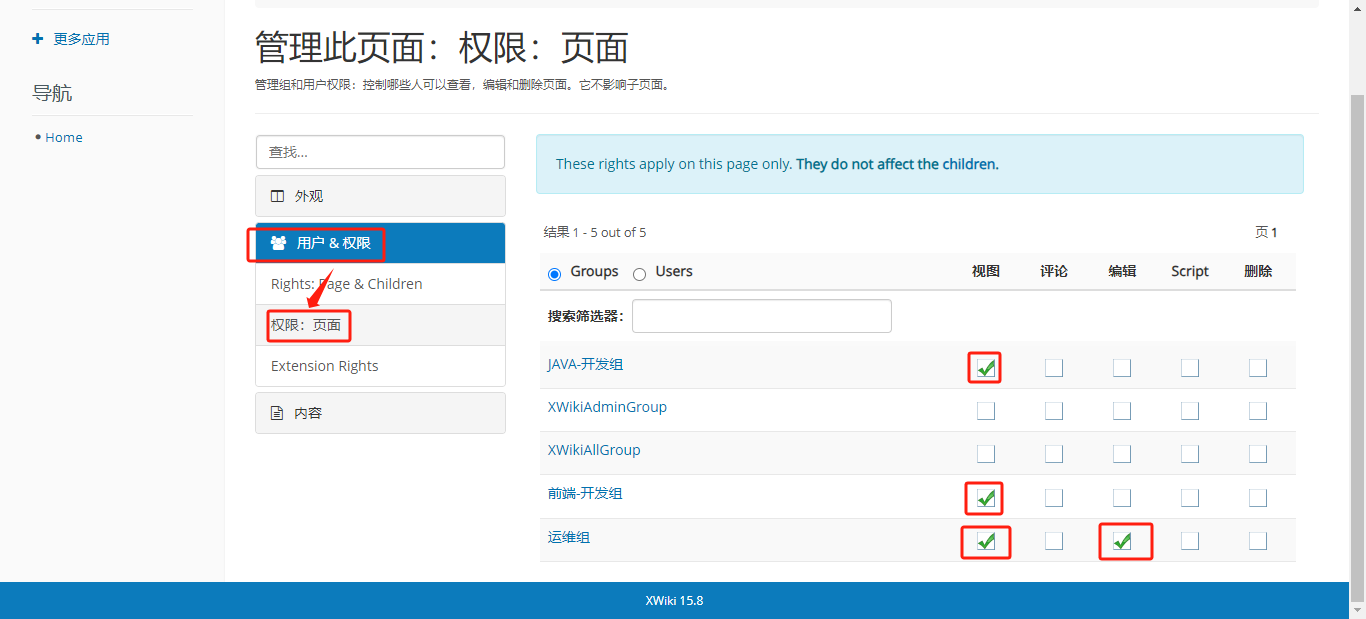
用户权限
编辑标题&内容